Not talking about what happens at the friendly neighborhood bar… This is about remembering to take before and after photographs of your bonsai as well as the work in progress so you and your bonsai friends can feel adequately impressed after all the work (er… drinking) is done. Well, maybe not done as in finished since the growing continues but you can always take follow up pix too. Taking photos help you to remember what the tree used to look like, to really LOOK at your tree, to see things that can be improved, to remember what you planned to do next, gives you a journal for future reference on similar trees, and either make you humble or give you bragging rights. Heck, you might even enter a photo in a contest or use it for an exhibit entry. Most of all, the pictures help you to learn about the tree. I don’t have a fancy camera so I use my phone and the pictures are only adequate right now and usually just make me humble. So here are a few humble photos of two very different trees I worked on recently.
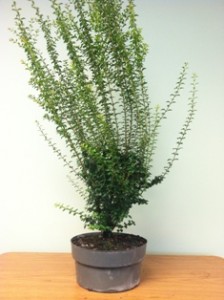
This is how it looked when purchased. Lots of foliage, branches to choose from, healthy looking and look at those small leaves – sweet!
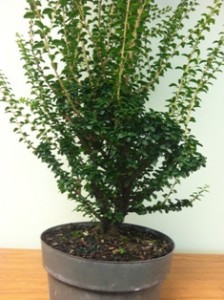
Below is a close up shot. You can almost see the original outline of the tree before all the outrageous, straight up growth!
- Dwarf Ligustrum – before – close up
Below is the tree after the first styling. Definitely starting to look like the makings of a bonsai. Will let it grow in the pot for a year to increase the trunk size. These trees make nice little forests too. Needs a little tweaking yet and will find a nice pot for it before next year. Have to remember to take OFF the WIRE! The photo file date will help with that. Time to set a reminder!
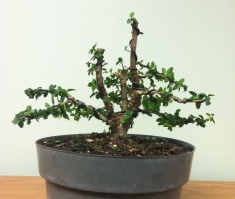
Here’s the Ficus Microcarpa that was worked on last summer – see where the lower branches were tied down. Also used a wedge cut to lower the upward tilt of the two lowest branches to a downward angle.
Ficus Microcarpa – before second styling
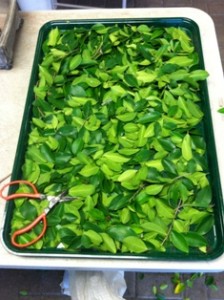
Brother can you spare a leaf? (Sorry – bad recession joke). It was best to defoliate to see the branches and when repotting. The leaves will sprout quickly; especially since it is a ficus.
It’s been less than a week and the new leaves are already sprouting! Lots more branch pruning to be done then it can go into a pot.
After some drastic root cutting, I like the banyan-style in the new home. A few branches and banyan roots need adjusting but it’s coming along nicely and the new growth is already starting one week later. The new angle in pot is helping the bar branch look and next year, we will be able to maximize the angle after the roots adjust.


